Most people don’t worry about this. But when it comes to safety and compliance, or even the occasional force-push or delete, you will be happy to still have a working backup of your repository. This is how to do it easily.
In order to get all your repositories, you are faced with two challenges: (1) get a list of repos and (2) actually download or update everything.
Go get my git
Let’s start with the latter: Getting all your git.
My first thought was something along these lines:
test ! -d repo && git clone https://github.com/user/repo.git
cd repo
git fetch --all --prune
git pull
It’s simple to start, but will quickly open questions like: What folder structure to keep? Will these git commands work in every situation? And finally: Shouldn’t I create a wrapper for this in <insert favorite scripting language>?
A great solution to all these questions is to use a project like ghq instead.
ghq get -u -p https://github.com/user/repo.gitWhich will create a folder structure with your repo:
.
└── github.com
    └── user
        └── repo
            ├── ...
            ...
The destination folder for your backup can be configured this way:
git config --global ghq.root <DESTINATION>
ghq get -u -p https://github.com/user/repo.git
This is especially important if you plan to use ghq for other purposes and change the destination. Otherwise just rely on your git-configured ghq.root.
A great improvement for backups is to remove your local workspace. To restore your data and any future work with the repository you only need the .git folder. Local files can quickly be removed with:
rm -rf github.com/*/*/*This command will leave all your “hidden” files intact, i.e. it won’t remove the .git folder. When you want to restore your workspace, it’s as simple as:
cd github.com/user/repo
git reset --hard HEAD
This practice may easily cut your total size in half.
From here you can continue with whatever method you like: Keep your repos on a backup node, copy them to FTP or even opt for a nice S3 backup (see this guide)
Find my repos
When you want to automate this for multiple repositories, you could always opt for a fixed list with all needed entries inside (example in ruby):
repos = %w{
  https://github.com/user/repo1.git
  https://github.com/user/repo2.git
  ...
}
It’s alright if you don’t have too many repositories or don’t mind the overhead of managing this list.
A more advanced solution, however, is to back up all repositories of a user or group. This approach depends on whichever provider you use for serving your git, i.e. Github, Bitbucket, Gitlab, or friends. All of them have different APIs for querying users and their repositories.
Let’s show two examples written in Ruby, one for Github and one Bitbucket.
Github
Get the
octokitgemgem install octokitConfigure an access token in your Github profile.
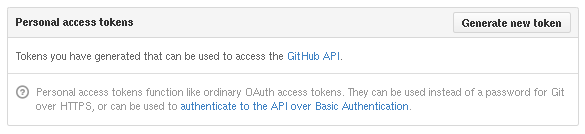
At the time of writing: Go to your User Settings, “Applications”, under “Personal access tokens” click on “Generate new token”. This token will be used in the next step.
Get all repositories for ghq
require 'octokit'
github = Octokit::Client.new access_token: "..."

# list all repositories of a user/group
repos = github.repositories(user="...")

# get a list of clone urls for ghq
urls = repos.map{|x| x[:clone_url] }
Bitbucket
Get the
bitbucket_rest_apigemgem install bitbucket_rest_apiConfigure an OAuth consumer.
At the time of writing: Go to “Manage Account”, “OAuth”, and “Add consumer”. Each consumer comes with a key and secret which you need in the next step.

Get all repositories for ghq
require 'bitbucket_rest_api'
bitbucket = BitBucket.new client_id: "<key>", client_secret: "<secret>"

# list all repositories of a user/group
repos = bitbucket.repos.list

# get a list of clone urls for ghq
repos.map{|x| "git@bitbucket.org:#{x['owner']}/#{x['slug']}" }
Final thoughts
It’s quick and simple to create a full backup of all repositories as this article has shown. The next step is to attach it to your backup system and get it running regularly. We have also opted for an encryption layer on top for data privacy which is highly recommended for all data that is not open source.
Enjoy!